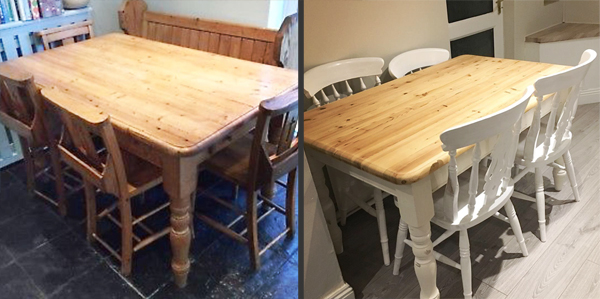
How to upcycle a dining room table
I recently repainted my dining room and decided I finally needed a new table to properly fit the space. A quick search online showed the dining tables I wanted for around £250-300. That was a bit more than I wanted to spend, so I decided to try and find something cheaper and upcycle it.
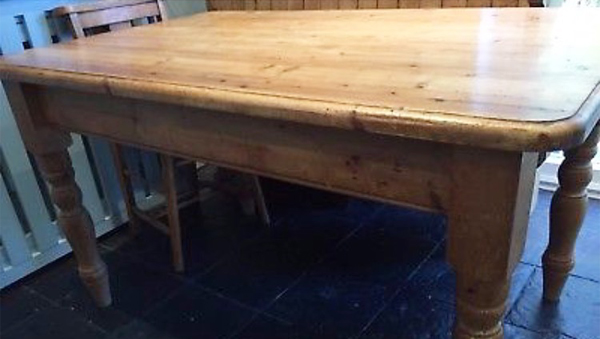
I found a cheap old wood table from eBay for £50 and then used some paint and materials I already had. After buying a couple of extra supplies, the whole thing cost me about £60 and the finished result was amazing.
In case this helps you do something similar, here’s what I did!
1. Prepare the tabletop
I sanded down the old table top using a powered hand-sander (a Black and Decker Mouse – Amazon has a good deal on it at the moment) using 40 grit sandpaper to begin with, then once the top layer of old varnish and dirt was removed I switched to a finer grit paper, using 120 to smooth it over and then finally polishing it off with a 240 grit sandpaper.

This sanding process took about 2 hours using the electric Mouse palm sander – I would highly recommend you borrow or buy one of these as I think I’d probably still be at it now if I’d been doing it by hand!
2. Prepare and paint the legs
I flipped the table over and then lightly sanded the legs and side ridges. This was to create a bond for the paint to stick to and wasn’t as rigorous as the tabletop sanding.

I wiped over this with a damp cloth to remove any dust or dirt and once the legs were completely dry from this, I applied two coats of white chalk paint, leaving 4 hours between each coat.
I had some leftover Rust-oleum furniture paint but you can use a variety of different brands or colours.
Chalk paint can be awkward to use, so if you notice the paint is getting thick or gloopy, simply add some water and stir well, then continue painting.
3. Distress the legs
Once the chalk paint was dry, I sanded parts of the legs to create a distressed look, using a medium grit sandpaper. Chalk paint is designed to create this aged or distressed look so If you didn’t want it finished this way, then you could instead just prime and paint the legs the same way I did the chairs, which I’ve outlined below.
4. Wax the tabletop
In the final step for the table, using a microfibre cloth I applied a thin even layer of Rust-oleum clear wax in small circular patterns to the tabletop.
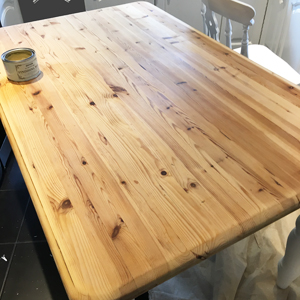
I let the wax sit for 10 minutes before I used a separate microfibre cloth to buff the wax into a shiny polish. I then repeated this process about 4 times to achieve the final result.
5. Prepare and paint the chairs
For the chairs, I sanded them down lightly (again this is just to create a bond for the primer to stick to) and then wiped any excess dust/sand away with a damp cloth. Once they were dry, I applied a single coat of Zinsser primer and left them to dry for about 4 hours.
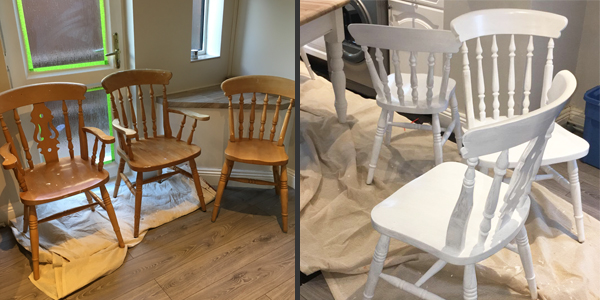
Once the primer was dry I applied a thin layer of white Satinwood paint. Once this was dry, I applied a second layer to finish it off and smooth it out. You can sand them down between layers using a very fine sandpaper but I didn’t do this.
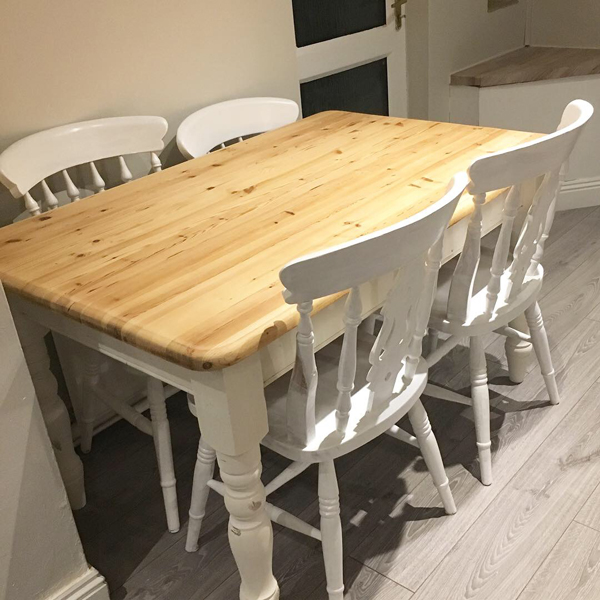
A brand new second hand solid wood table on the cheap!
Transforming my beaten up second hand table into something worthy of my freshly painted dining area took about 12 hours in total.
I would always recommend making sure you have all the tools you need before you start a project like this as it makes things so much easier. I also made sure that I wrapped my paintbrushes in cling film whilst I was waiting to re-paint to stop them drying out without having to completely clean them all the time.
I was fortunate to have some left over materials from previous projects, but I hope this post helps you achieve the same result for under £100!
Update – what did I use?
I’ve had a few people asking me what type of wax and paint I used, so thought I’d put all the links that are throughout the article in one place in case that’s useful!

This is the first thing that goes down to help the paint bond to the wood.

This leaves a gloss finish but is water based so doesn’t have the same level of fumes left hanging around afterwards. It dries pretty quickly too.

This is what I used to get that distressed look, but only on the table legs.
Black and Decker Mouse
Honestly I don’t think I’d have been able to do this project without one of these! My arms ached a lot the next morning and if I’d had to do everything by hand I think they might have actually fallen off!

…and of course the table itself! I managed to find mine on eBay but I unfortunately can’t give you a link to that as it was obviously a one off. The right thing for you might not be there straight away, but save some searches and keep checking and you will find the perfect inspiration for a project like this before you know it!